Showing posts with label Tau. Show all posts

Thursday, May 11, 2006

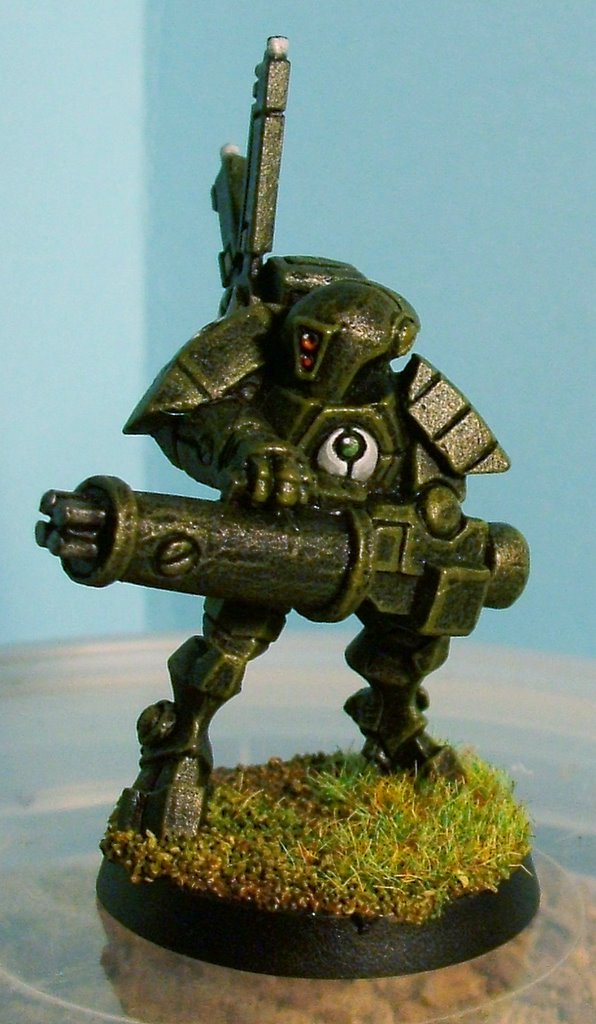
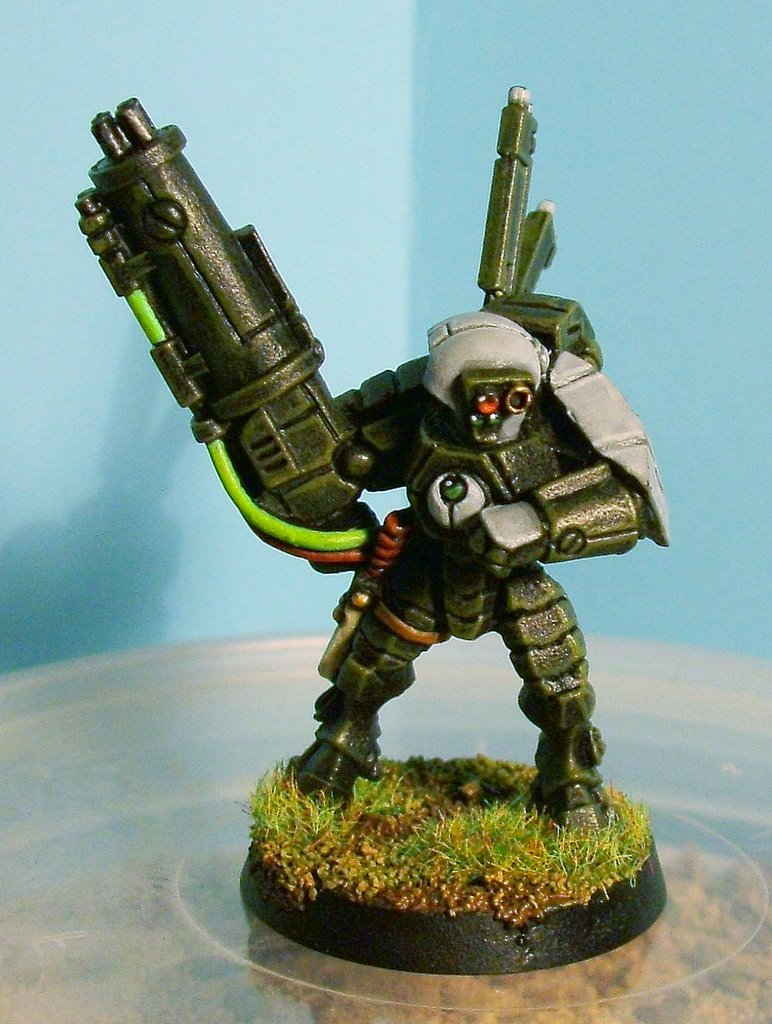
WIP - XV88 - Advanced Stabiliser System


This is how I have represented the advanced stabiliser system, which allows XV88s to move and fire heavy weapons. Its the fuel canister from a fusion blaster, attached to a sheild generator and then fixed to the battlesuit by a small piece of q-tip stem - about 3mm in length.

Tuesday, April 18, 2006

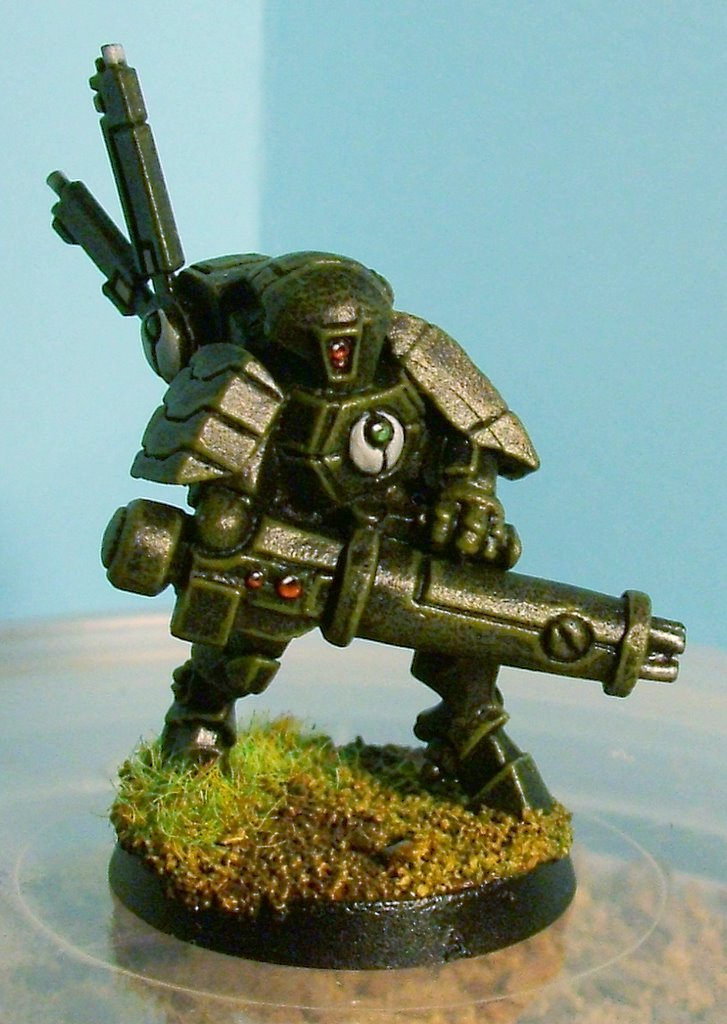
WIP - XV88 suit 2

This is the second of my XV88 suits. Both have Advanced stabilisation systems so they can Fire and Move with the Railguns. This suit has replaced the smart missile system with twin-linked plasma rifles which will lend a bit of close protection firepower to his team in situations where the enemy are getting a bit too close for comfort. The railguns are placed on the more traditional shoulder mounts so the plasma rifles benefit from the extra mobility of arm mounts once things get hairy. Posted by Picasa

Monday, April 03, 2006

WIP - Pirahna

Here is the first of three Pirahna skimmers. I'm thinking of two equiped with brace of seeker missiles and a burst cannon each and a third with a fusion blaster. This should make a rapid reaction unit with a nice balance between anti-infantry and anti-vehicle capabilities. Posted by Picasa

WIP - XV88 suit

I seem to be in a building rather than painting mode lately, Especially now the new Tau Empire codex is out. Here is the first of my XV88 suits. They've been in the cupboard for a while now and I finally decided to start putting one together. I've wanted to try mounting the rail guns on the arms since before the excellent Forgeworld models came out doing just that. While putting this kit together I realised it takes a certain degree of commitment and trial and error to pose the lages in anything more dynamic than the most basic 'standing up straight' pose. Because of the enlarged feet you have to do a bit of cutting and re-building of the lower legs. Despite a bit of swearing and a few scalpel wounds to the fingers, I think the end result is worth it - Just need to get around assemble his team-mate and get round to painting them to see the finished product. Posted by Picasa

Tuesday, February 07, 2006

Tau Patrol


Here is a small patrol of Tau models, some of which have already featured on this site. They are displayed at home on my gaming boards.

The boards are made from 2' x 4' MDF boards from B&Q. I paint the board with a mixture of cheap white emulsion paint and fine sand to give it a textured undercoat. Next I spray it black (get a big can of black spray from B&Q, its much cheaper than using GW spray). Once the black coat has dried I dry-brush with several increasing lighter shades of brown.

You can take your GW paints down to B&Q and have them mix up a tin of waterbased emulsion to match most colours. £10 will get you a liter tin, which goes a long way and is much cheaper than trying to do it with GW's own.

The hills are made from 1" deep layers of polystyrene packing material, based on thin hardboard cut to shape with a jigsaw. Anywhere between 4mm and 6mm is good for basing. I bevel the edge of the base using a dremel with sanding pad. The polystyrene edges are rounded off using fine grade sandpaper. Once the hill is built I paint it with paint/sand mix, spray it black and dry-brush as for the boards.

Make sure the paint/sand mix covers the polystyrene well, or you will end up with melted polystyrene when the spray hits it. This can be quite a useful effect for rockfaces and battle-damaged areas but you need to control it and make sure it only happens in the areas you want.

Once the drybrushing is dry you can add patches of flock here and there to add variation. If you want to add different textures to the board surface you can glue on patches of heavier sand or gravel in places prior to the black spray stage but after the initial paint/sand coat. If you choose to do this be aware that these patches might mean that other placed terrain features don't always sit perfectly flat on the boards. Posted by Picasa

Tuesday, January 24, 2006

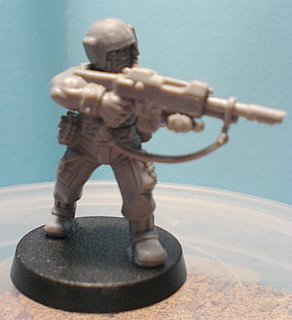
WIP - Human Auxilieries - Bare Arms

This model mixes some Catchan, Cadian and Tau parts. The legs, arms and Las-gun are Catchan while the head and torso are Cadian.

While building this figure I noticed that both the Catchan legs and the Cadian torso have a belt on them. If the two parts are combined as is it results in a figure with a disproportionatly long body. I found that of the two, it was easier to trim the belt from the torso rather than the legs. Once its done the two bits glue together fine without any noticable oddness.

This soldier is clearly an experienced old hand who has learnt what works for him after years of campaigning. He has adopted the newer issue helmet and torso armor but opted to retain his older pattern boots and fatigue trousers. He is also wearing a short-sleeved shirt under his armor to avoid overheating in combat.

WIP - Human Auxilieries - Pulse Rifle


This is the second member of my auxilliery unit, also armed with Tau weaponry instead of the Tau produced copy of the standard Imperial Las-Gun.

This model is made from mostly Cadian Shock Troop parts, aside from the Pulse Rifle and a Photon Grenade dispenser.

Like the squad leader he has no Imperial markings on any of his kit. Apart from the missing Eagles he looks to be well equiped with quality kit and proceading in an alert fashion.

Obviously a well trained veteran of many campaigns who has proved his worth enough to be trusted with a Pulse Rifle.Posted by Picasa

Friday, January 20, 2006

WIP - Pathfinder Team Leader - Profile View


Here is the Team Leader from my Pathfinder squad. He started out as one of the basic metal Pathfinder figures.

I added a flash suppressor to his pulse carbine, fashioned from a short bit of the stem from a cotton bud. He also carries one of the plastic bonding knives from the fire warrior sprue.

I still have a bit of work to do on the paint job but the basic colours have all been blocked in and the shading and high-lights have been added to helmet and the yellow areas of his suit. Posted by Picasa

WIP - Hammerhead Gunship - 3/4 Front View


This is a work-in-progress shot of my Hammerhead gunship. There is still quite a bit of work to do to it before it's finished. The secondary weapons are still witing to be painted, as is the commander figure. I'm using on of the Forge World Tau Tank Commander figures to add a little variety to the model. Posted by Picasa

Finished(ish) - DevilFish - 3/4 Front View


This is the first Tau vehicle I built for my army. It has a few extra features over the standard Devilfish model. The side hatch hinges have been drilled out and fitted with pins so they open and close properly. The interior detail has also been fully built and painted. The burst cannon s fully movable, as are the engine pods, and the two drones are detachable.

The model is basically done, but I can't quite bring myself to call it finished. I fully intend to apply some more weathering to it at some stage. Currently it just looks too well cared for to be an operational vehicle. Stay tuned for further news. Posted by Picasa

Thursday, January 19, 2006

Finished - XV15 Suits

Here are the other two regular members of my Stealth Suit squad.

The paint scheme for this unit is very quick and effective. First I undercoat with Chaos Black spray, followed by dry brushing with Tin Bitz then Boltgun Metal. Next I dry brush 3 or 4 succesivly lighter shades of green going from Catchan up to Cammo. If the green layers have made the model too dull I finish with a very light dry brushing of Boltgun Metal to put a hint of metalic sheen back in. Various edges then recieved a further highlight of Cammo Green. It takes about 25 minutes to paint a squad of three to this stage.

After that I add the helmet lenses and the green stone on the chest emblem as well as a touch of Boltgun Metal on the gun barrels. Next the white shield on the chest and pack as well as the antenna tips.

On the Squad leader (see last post) I went one step further to paint the helmet and shoulder guard in white and to colour the cables from the marker light red and green.

Job done!

The bases are covered in medium modelling sand painted Bestial Brown and then dry brushed with two lighter shades, Snakebite Leather and then a mix of Snakebite and Bronze Flesh to end and give it that orange tint. The final step is to apply patches of grass. I use a mix of Green Flock and Static Grass, which I think gives a more realistic look than either of the two on their own.

I prefer black bases to the green that seems to be more comman. After everything else is finished I go back over the base with a thin coat of Chaos Black. I don't mind if a bit of the texture ing material is hanging over the edge of the plastic base, but I make sure that anything not part of the texturing is clean and black. The very final step is a coat of varnish, in this case gloss to give the suits a bit of extra shine.

Finished - XV15 Suit: Team Leader


Here are a couple of pics of the Team Leader for my XV15 team. At the moment they normally take the field as a squad of three with a couple of drones controlled by the leader.

Their main function is to harrass the enemy flank by jumping out from cover and straffing with their burst cannons before disappearing as quickly as they arrived. They also work quite nicely as a hard-hitting fast-attack unit because of their heavy armor combined with jetpack movment.

All my unit leaders are distinguished from the rank and file by having a white helmet and shoulder guard. I find it makes them stand out from the rest of their unit, without requiring a hugely different paint job. This way you can include them when batch-painting the unit and then quickly add the white bits afterwards.


Finished - Ethereal: Aun'shi - Front View


Here is a pic of my Aun'shi figure. He normally takes the field as a generic Ethereal when I include him in my army

Wednesday, January 18, 2006

WIP - Gue'vesa'ui - Rear View


And here is the rear view. I've removed all the Imperial Eagles from his kit, seeing as its all copied from patterns rather than being original Imperial Guard issue. As a Gue'vesa'ui he carries a Pulse Carbine instead of the standard Las Gun. His webbing is also a mixture of copied imperial stuff as well as a Tau backpack.

WIP - Gue'vesa'ui - Front View


This is a sergent, or Gue'vesa'ui, for my Tau Auxiliaries. I put him together last night using parts from the Cadian sprue plus some stuff from my Tau spares box.